Applique

Experimenting with Leaves and Landscapes

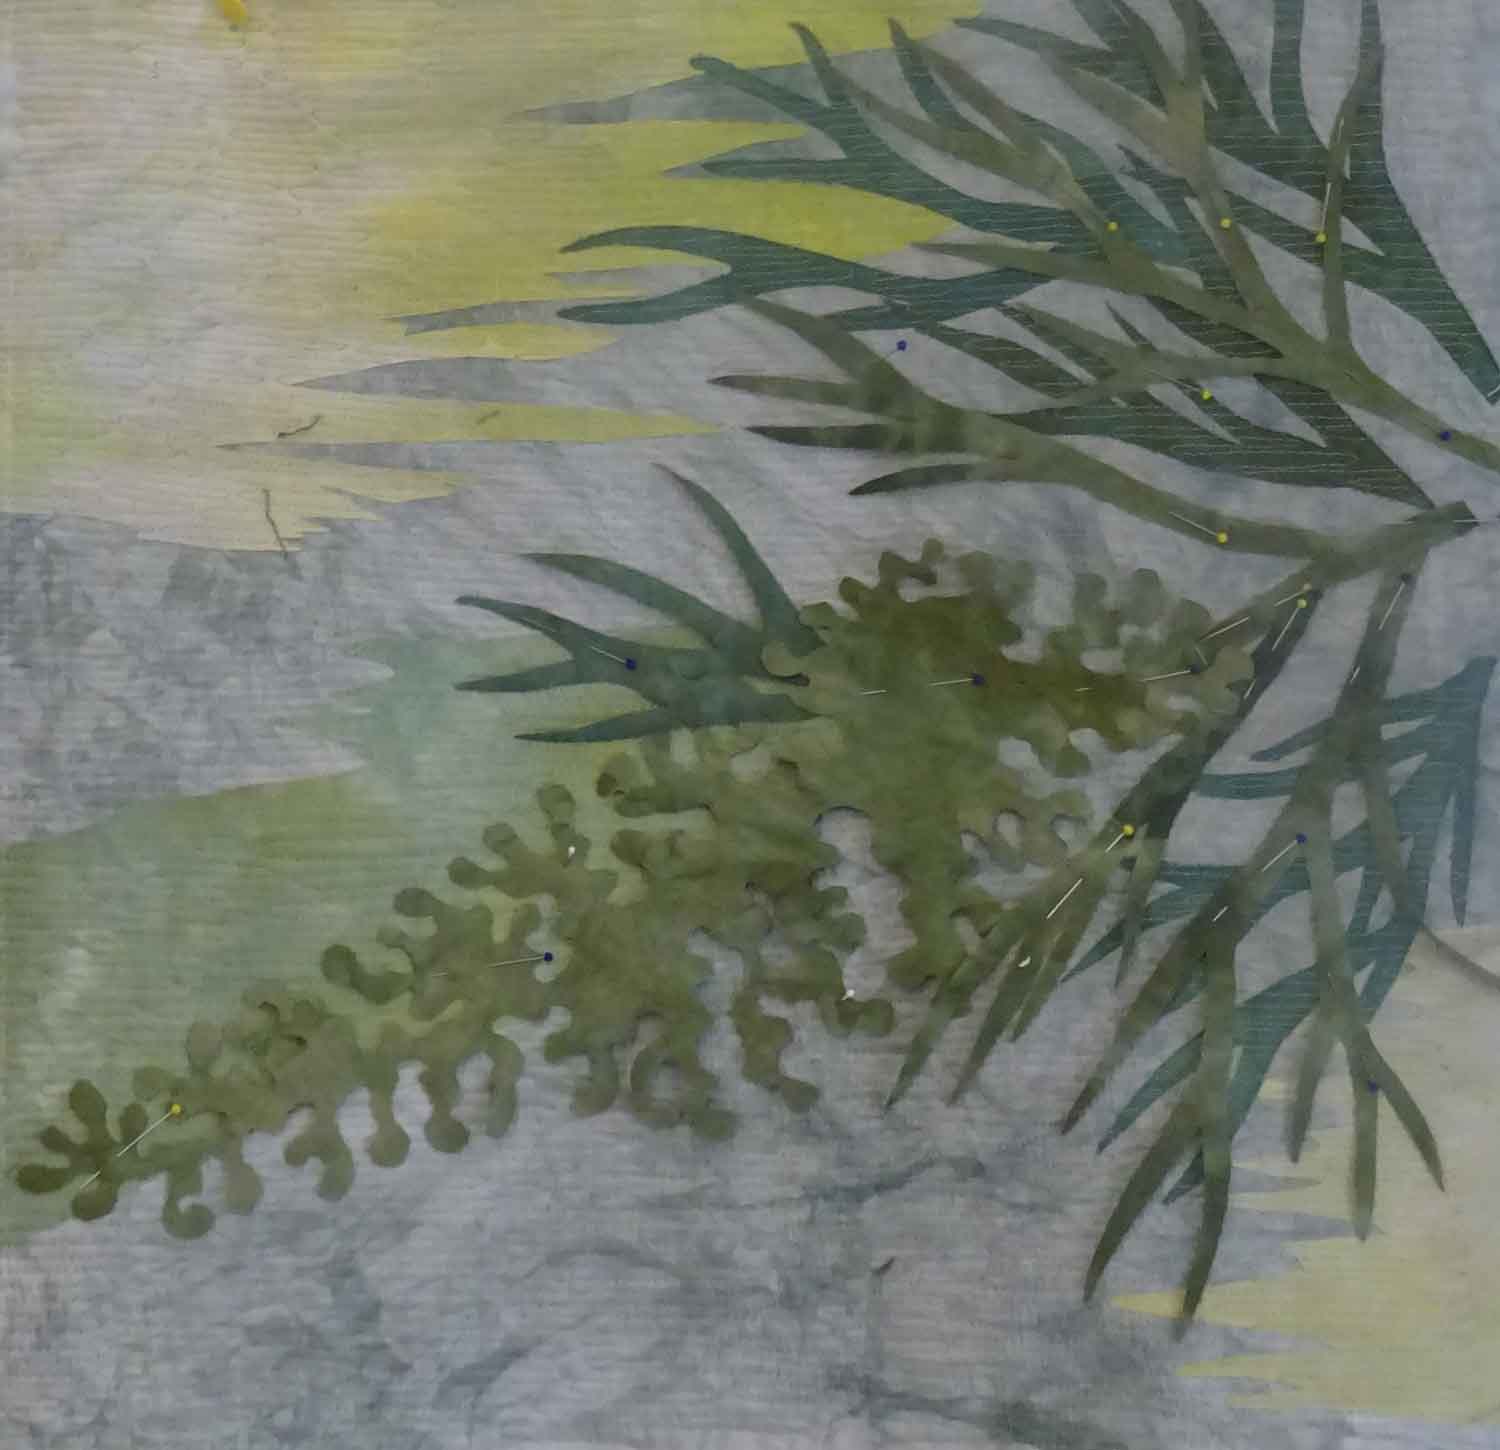
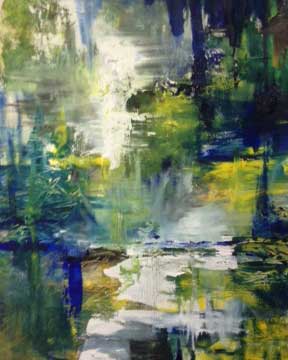
This last week I have been playing with ideas for my Leaf Series,  in part prompted by the drawing class challenge I shared last week (I'll show you how I'm going at the end of this post).

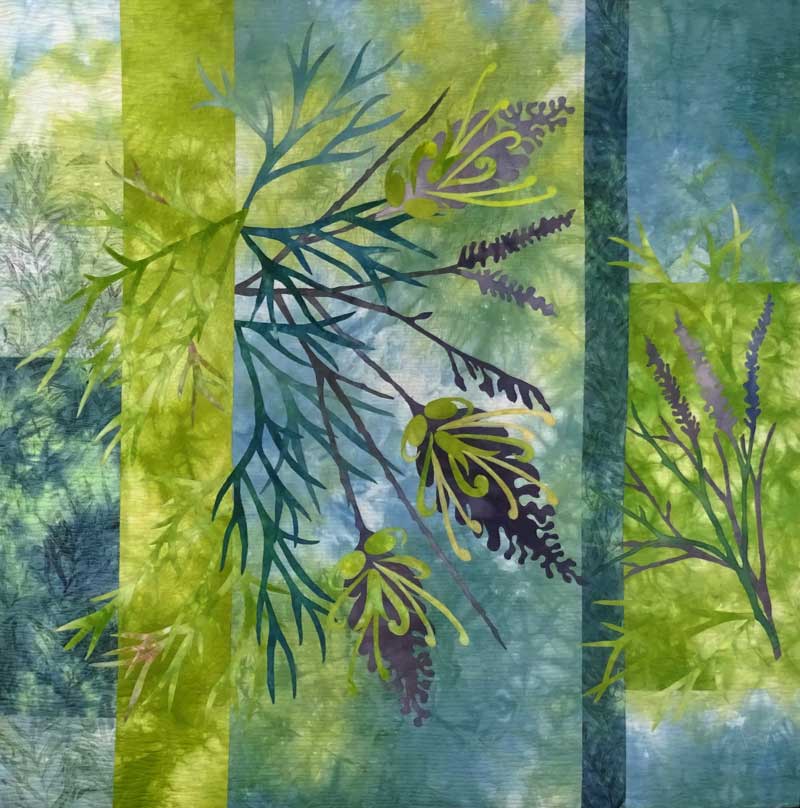
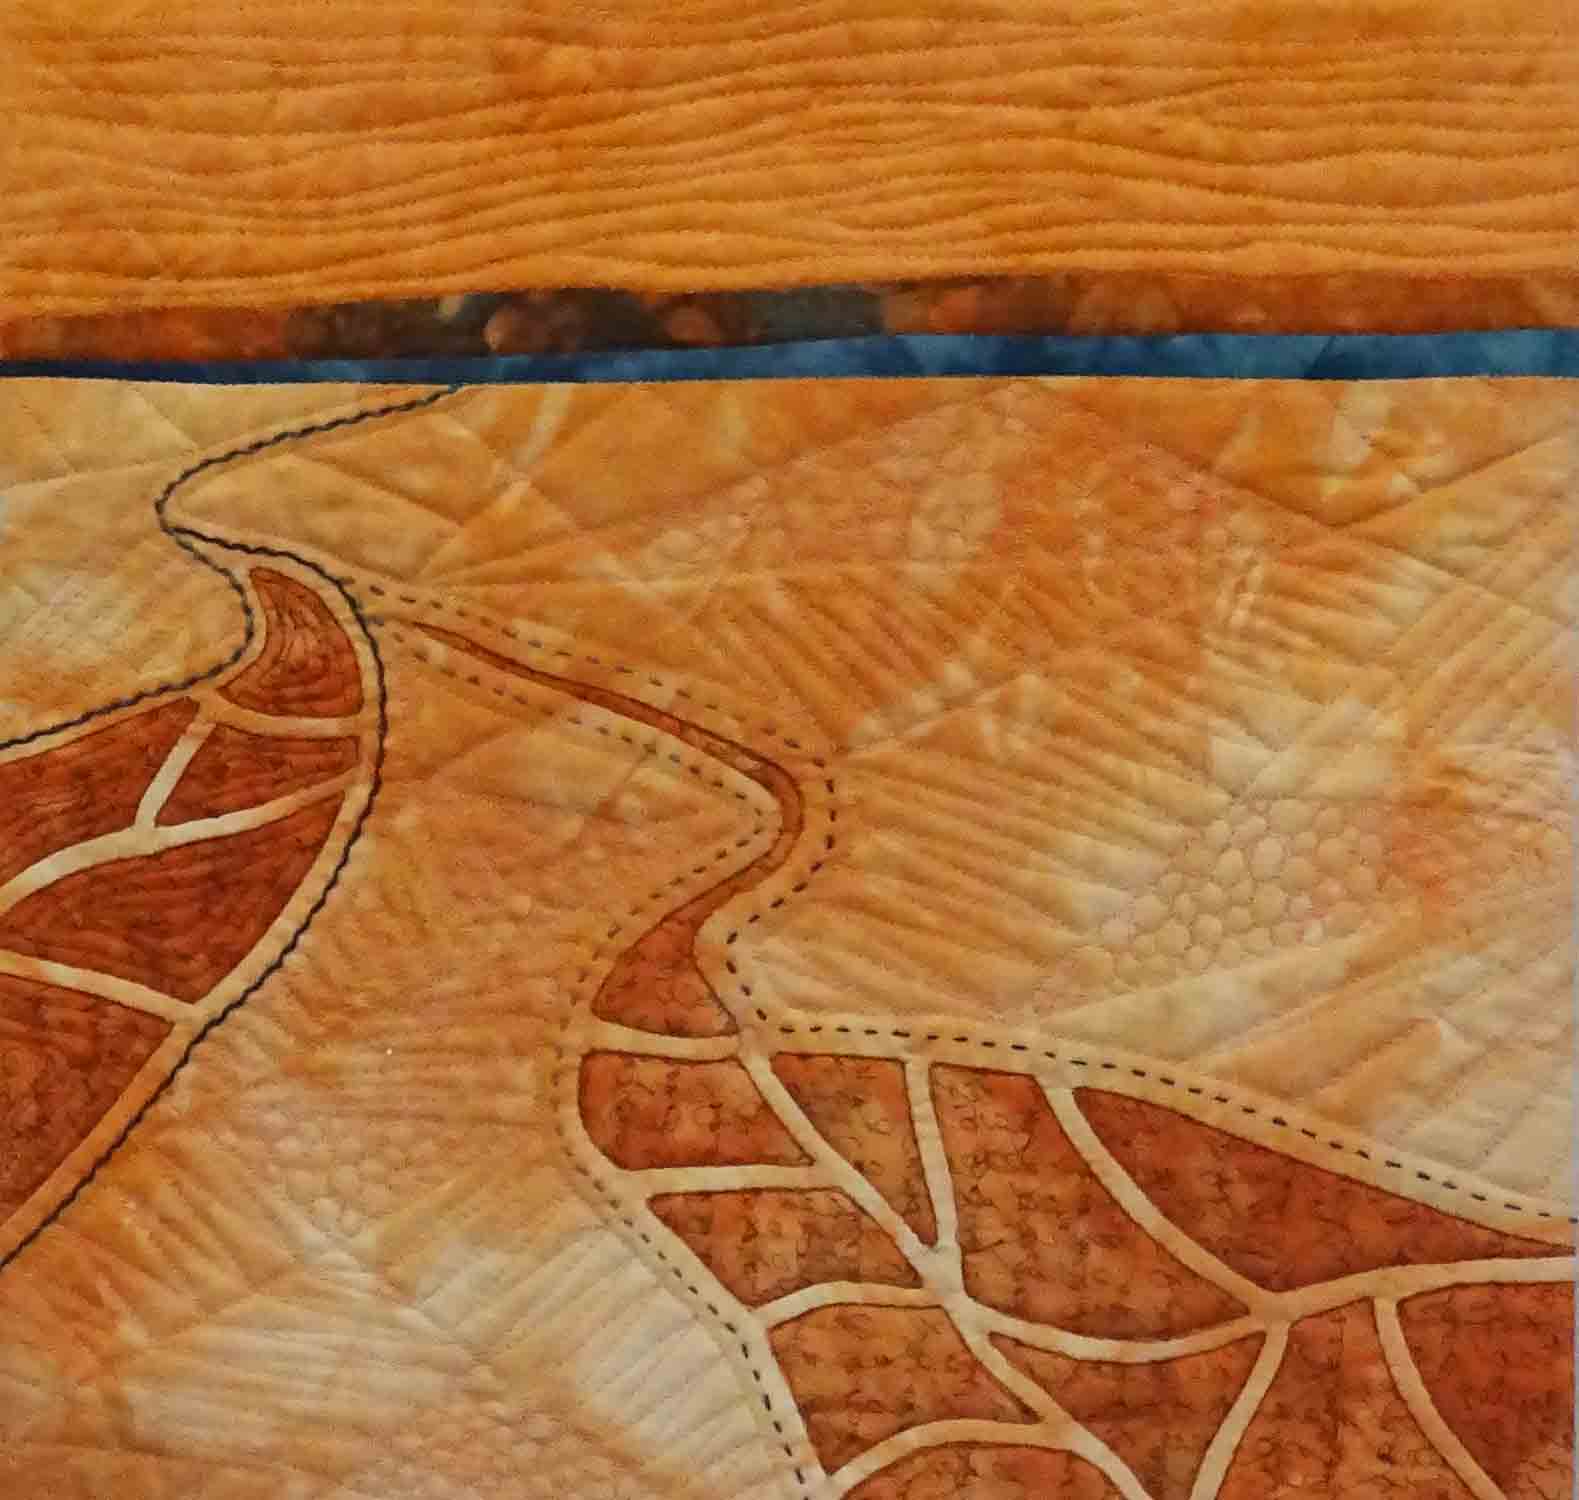
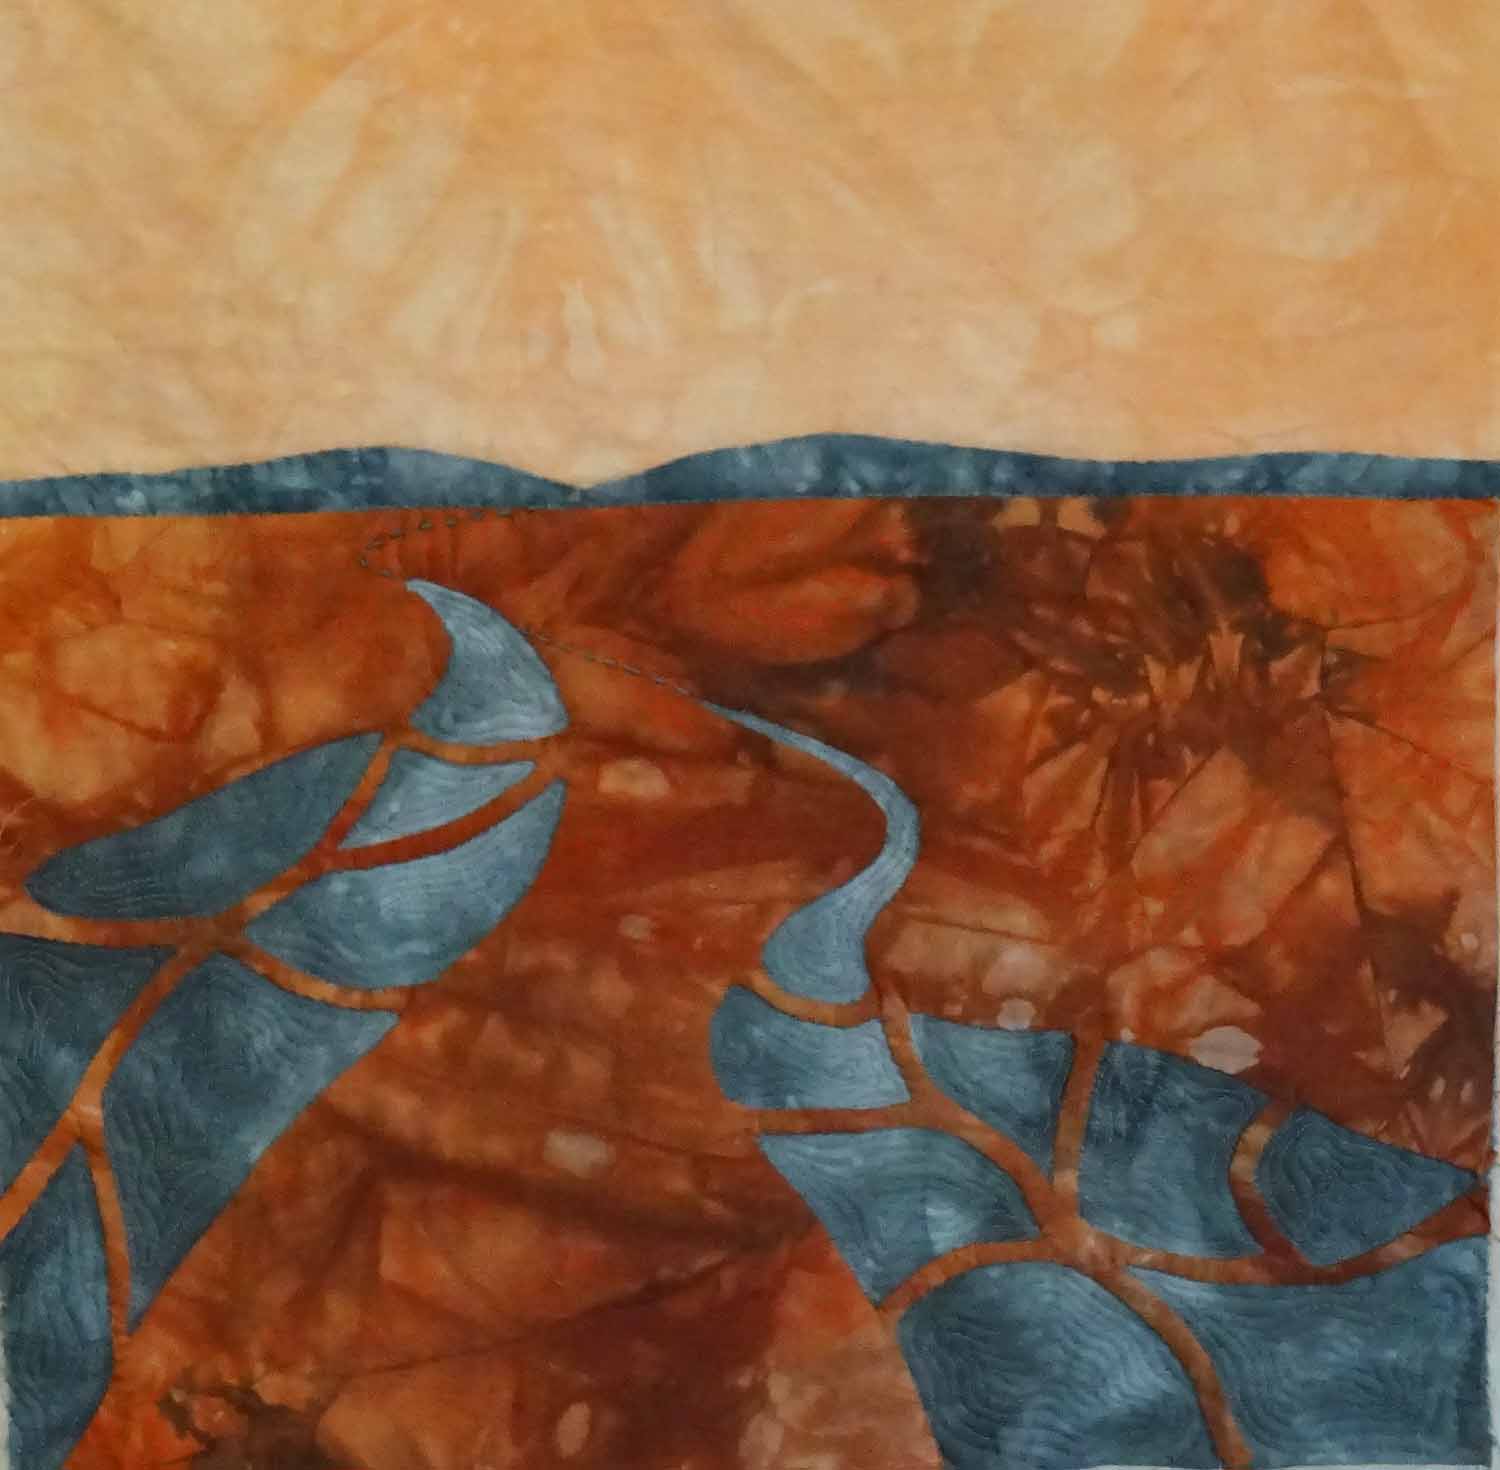
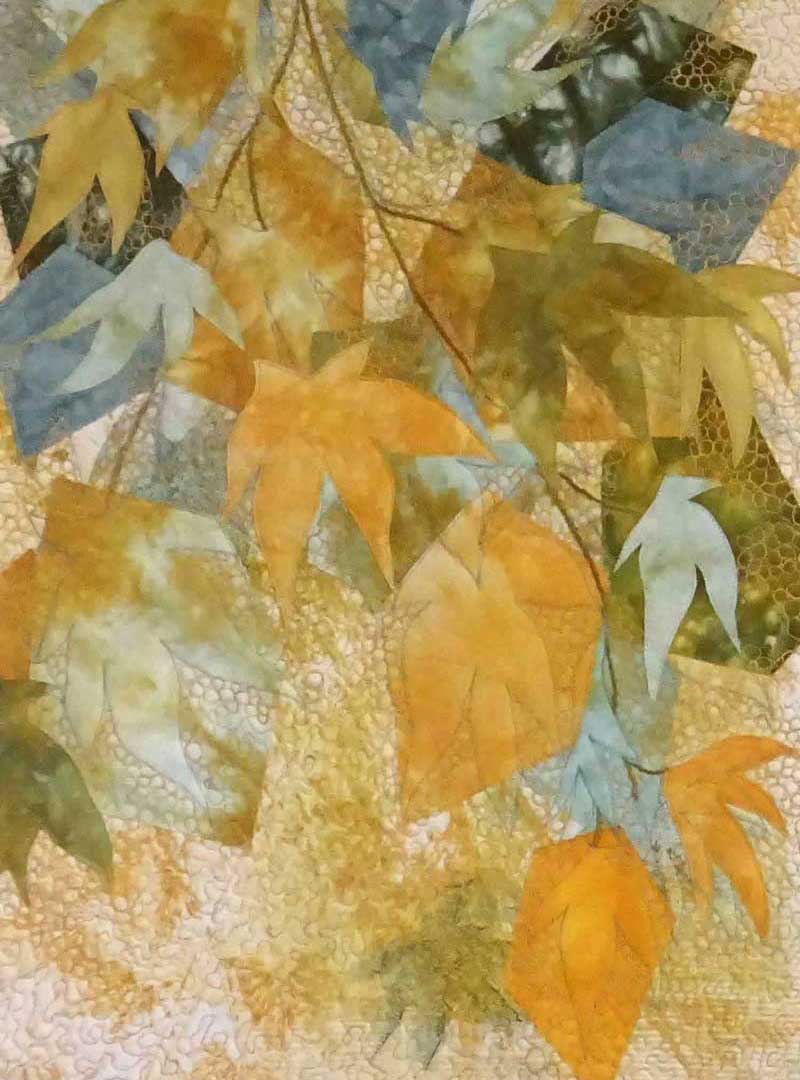
Decided to try combining a simple landscape with one of my favorite leaf designs and to make the leaves using a 2 step reverse applique to give a line effect.  I wasn't altogether satisfied with the result.  I think it would have worked better if I had used a darker tone for the line element?

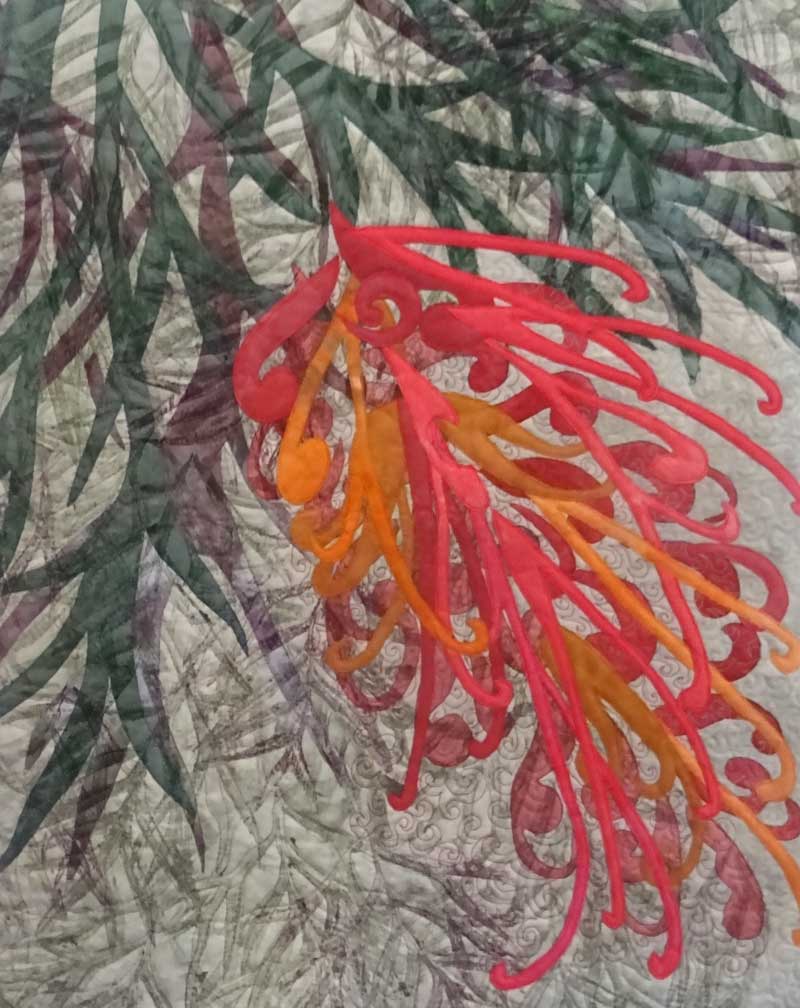
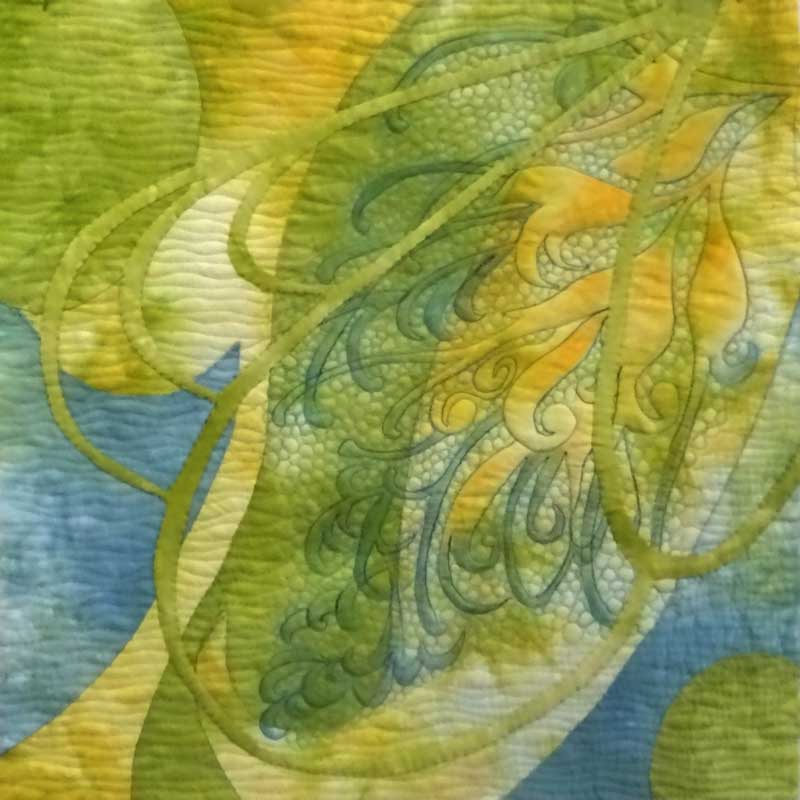
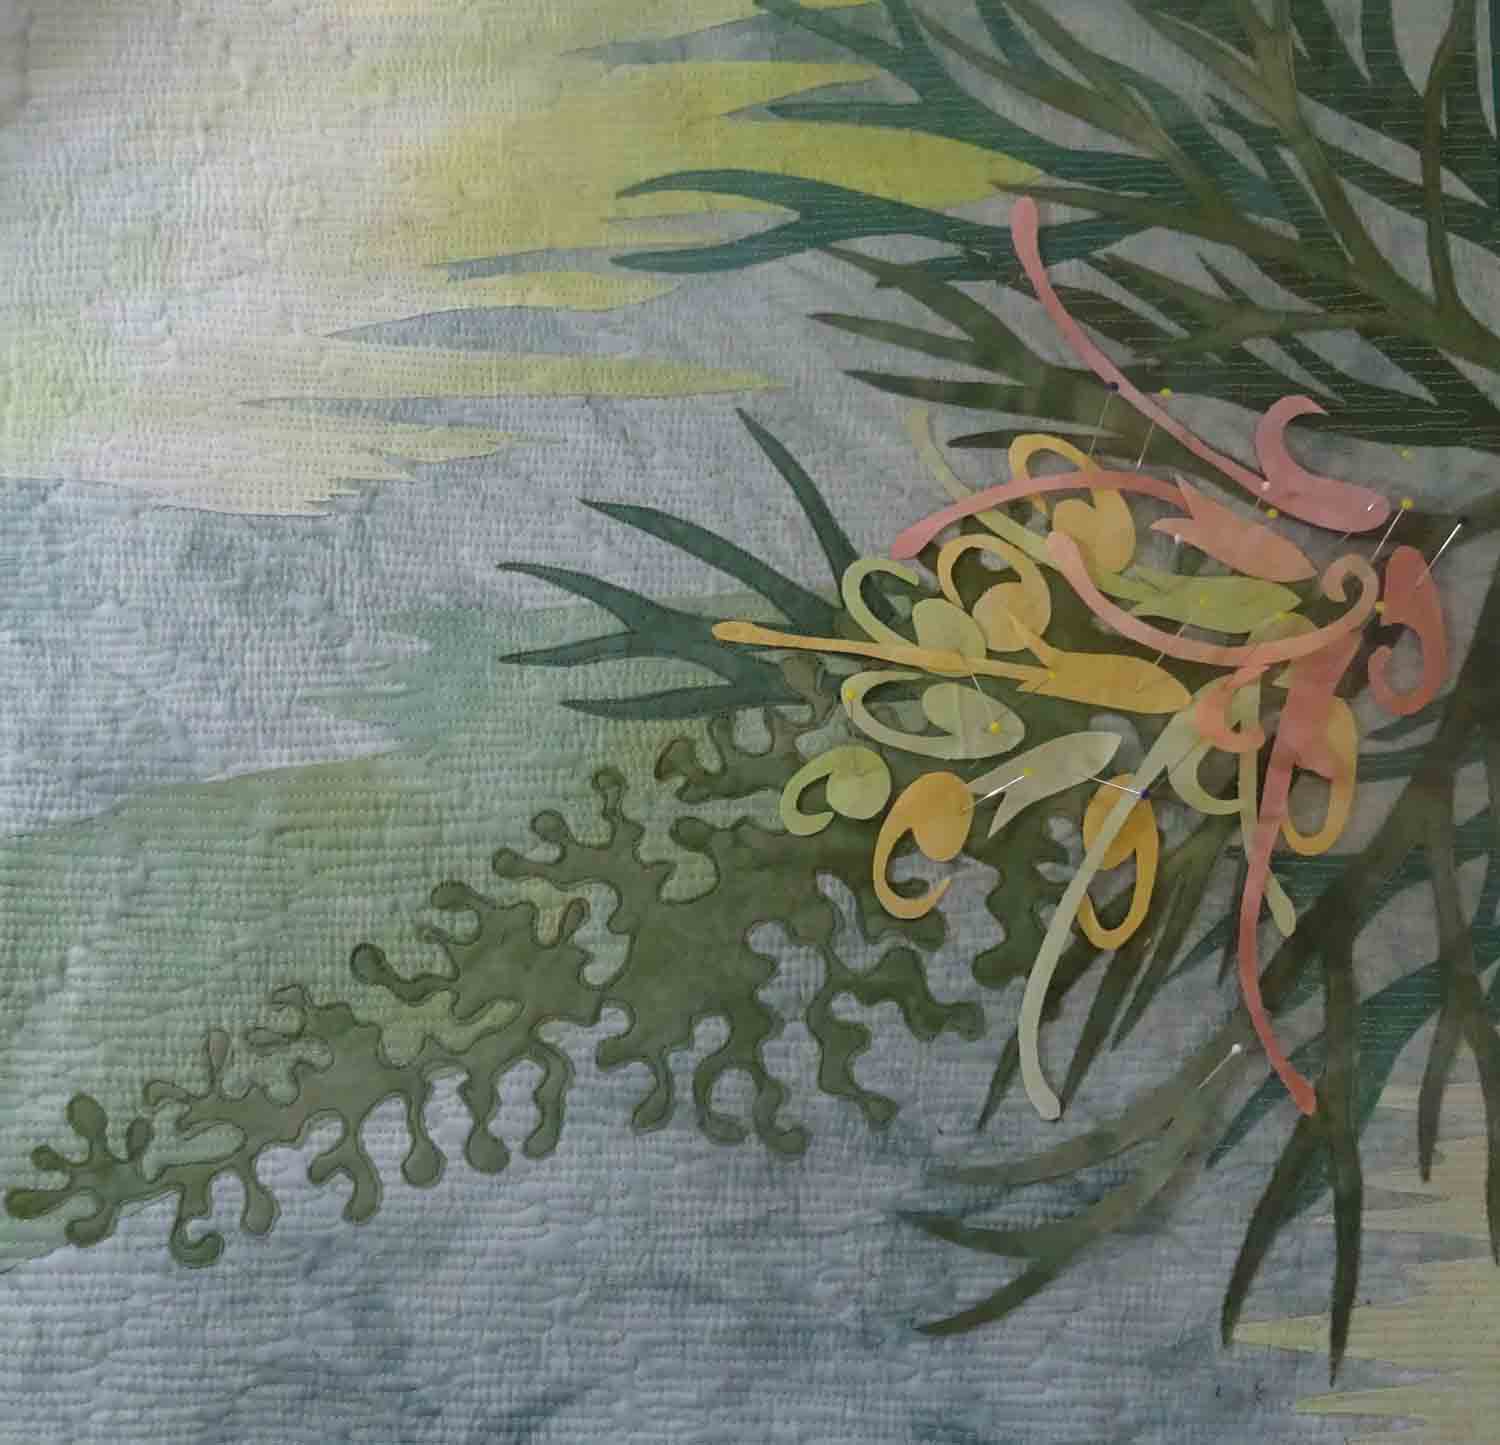
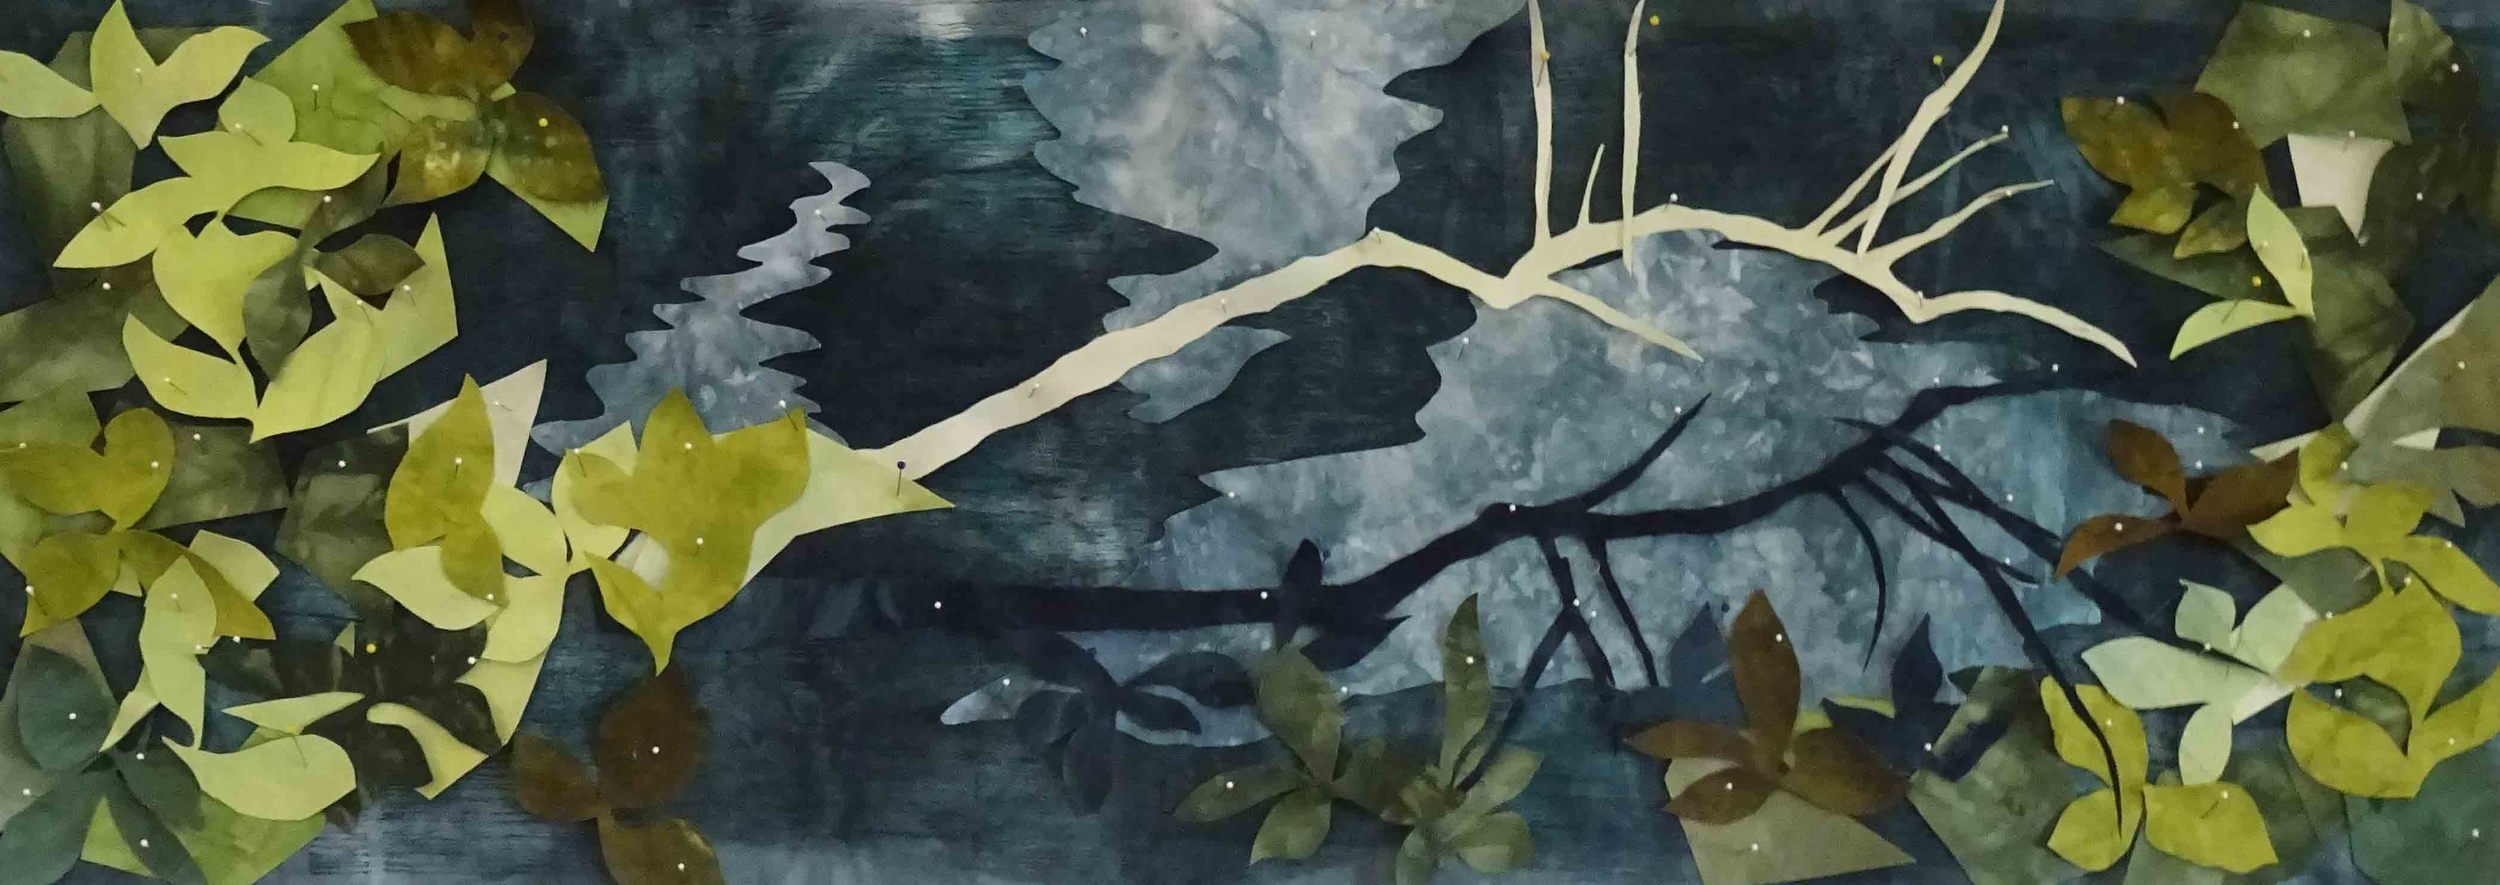
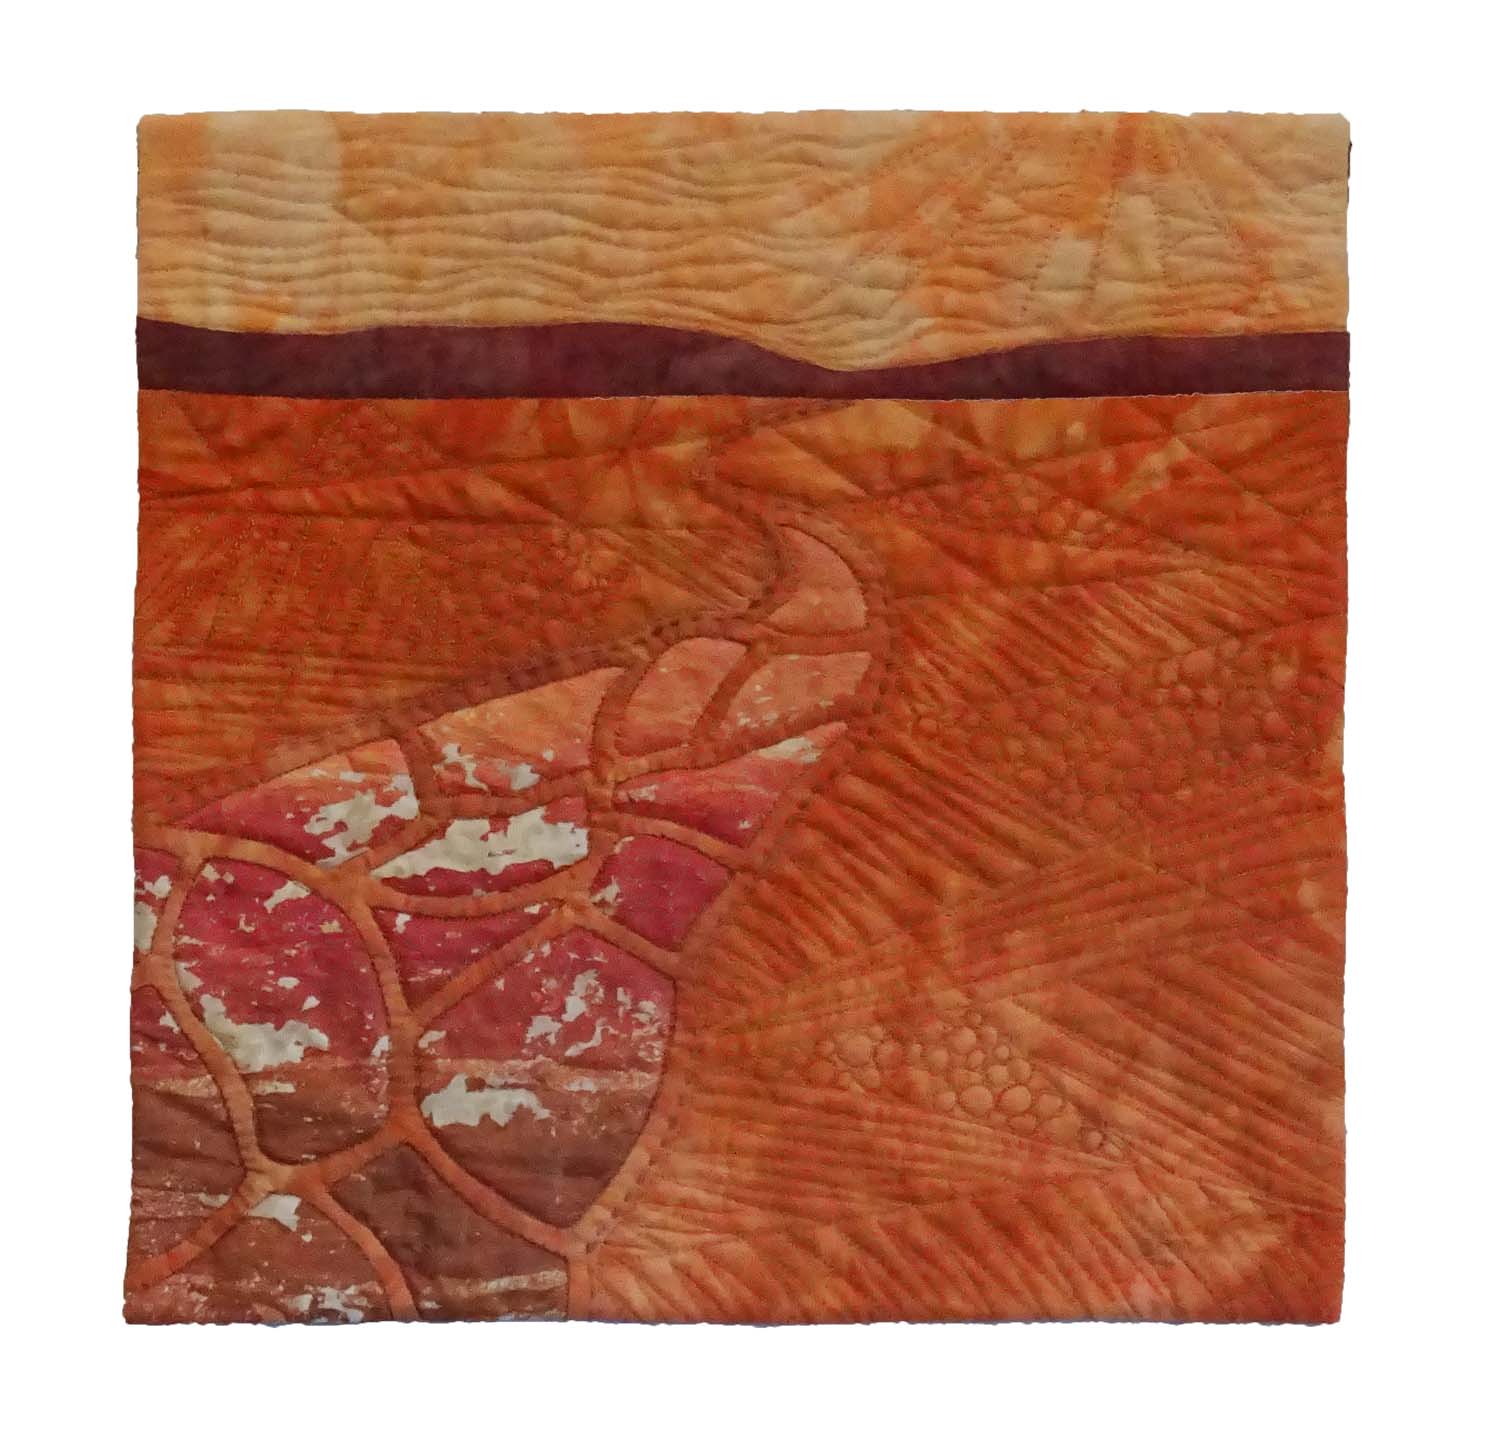
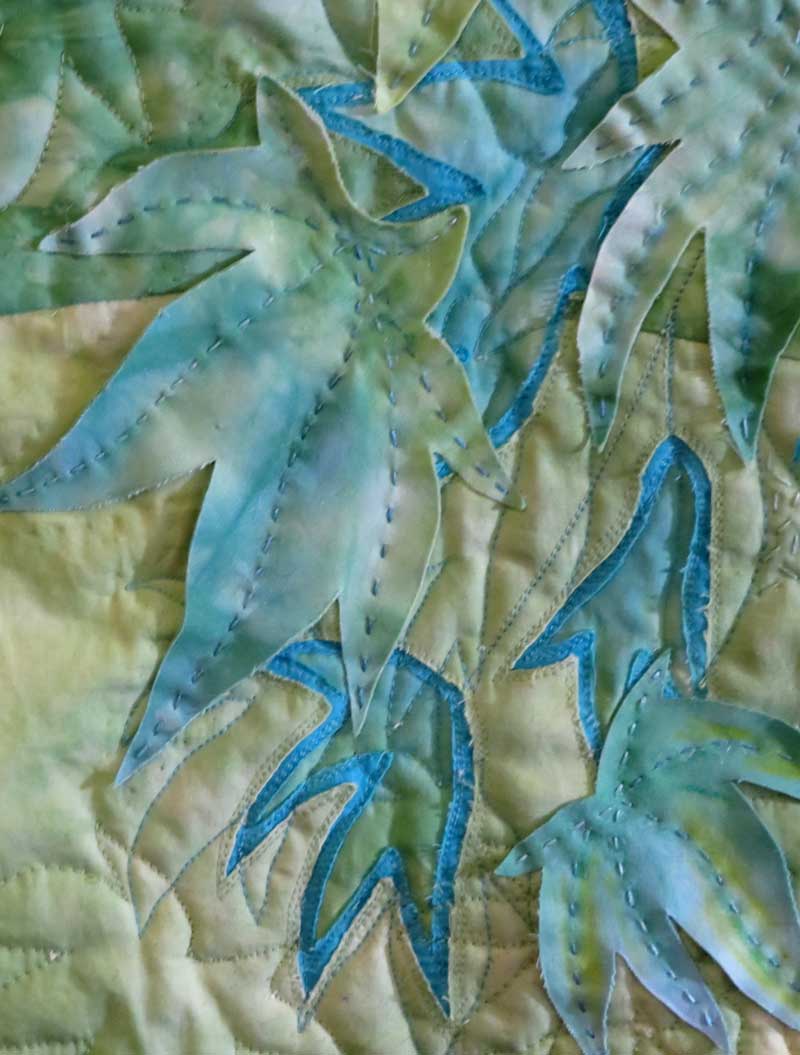
This seemed like a good opportunity to try our another idea for adding a dimensional effect, by using what I might describe as free form applique.  In this case I stitched the leaf shapes to the piece along the vein lines so the edges are free to lift and curl.  

I have also been adding some hand stitching for texture to complement the machine quilting which is less dense than my usual style (the hand stitching is  nice work to do in front of the fire on these chilly evenings!!)

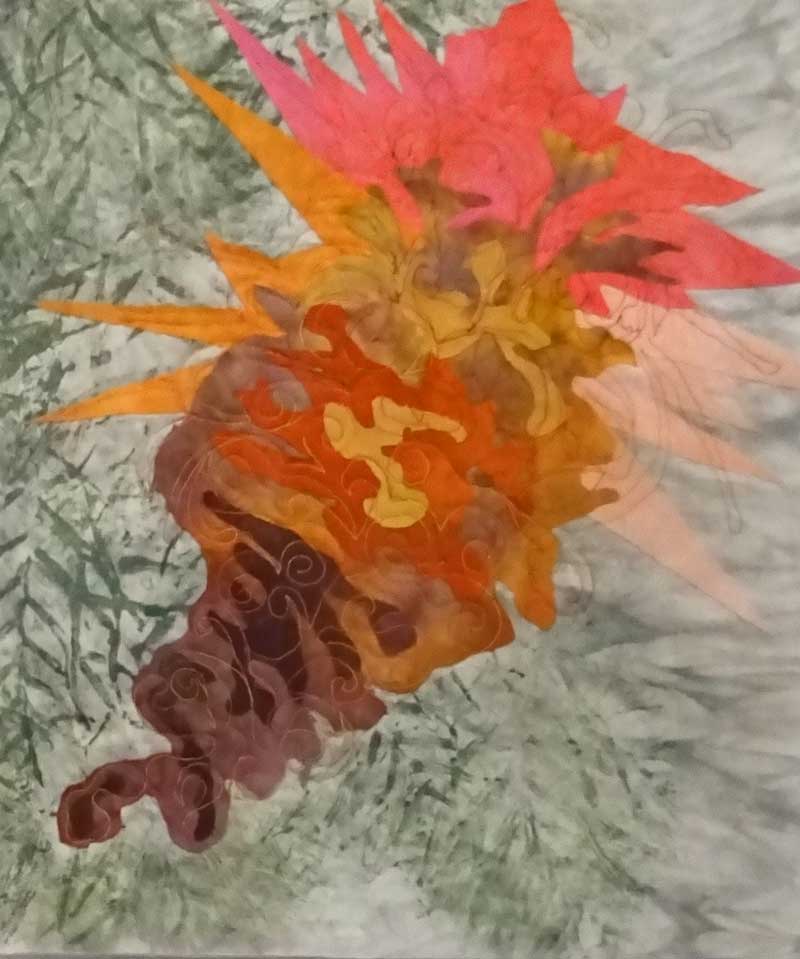
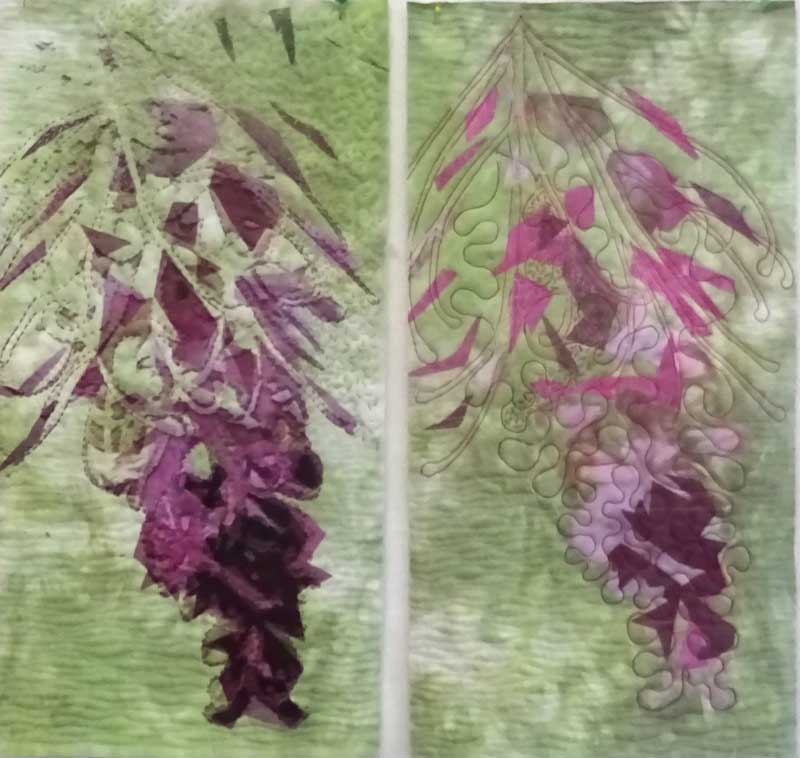
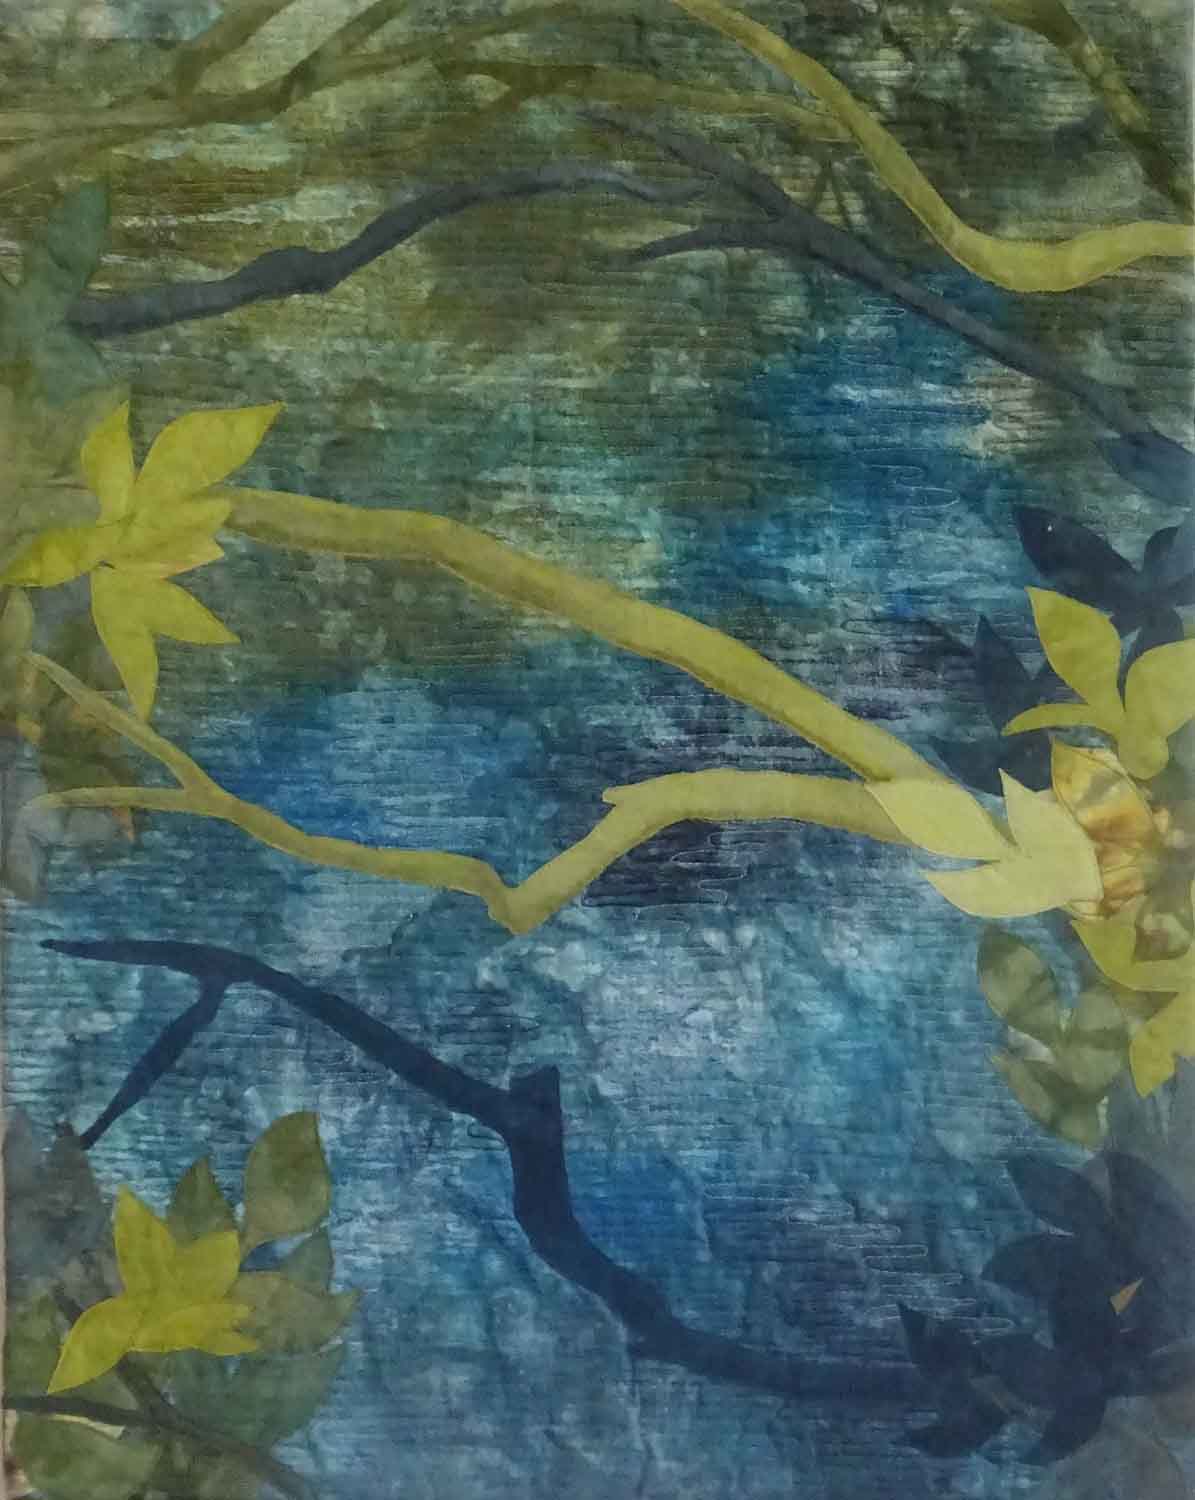
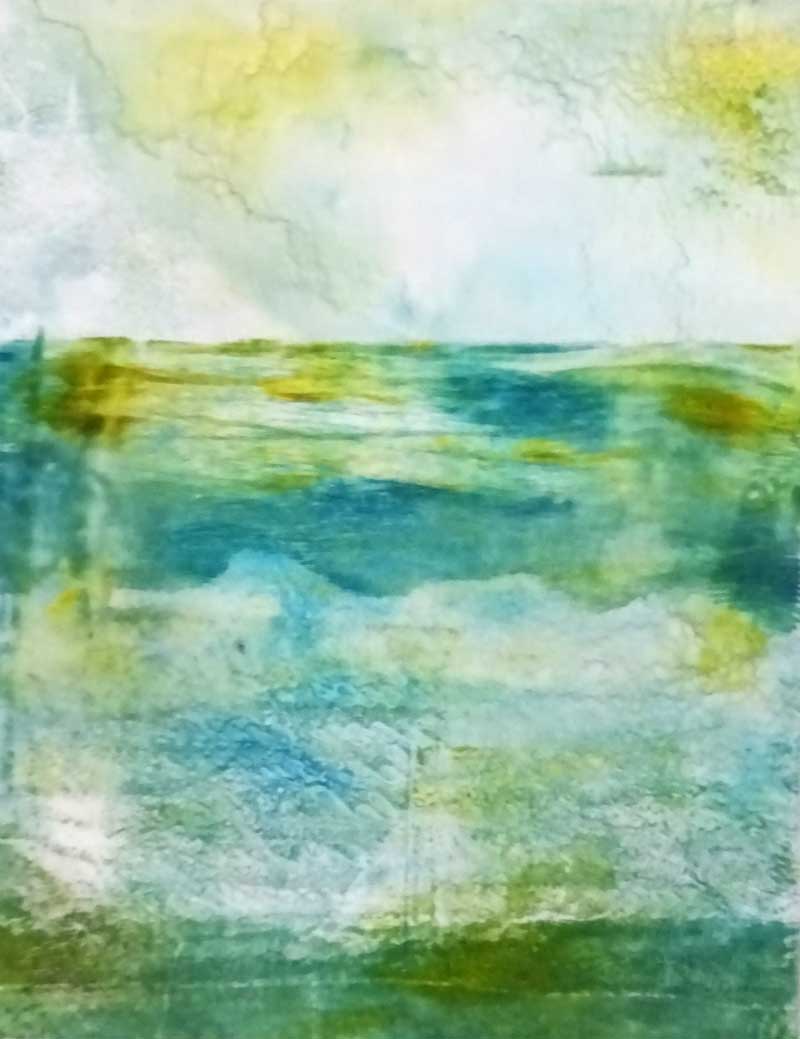
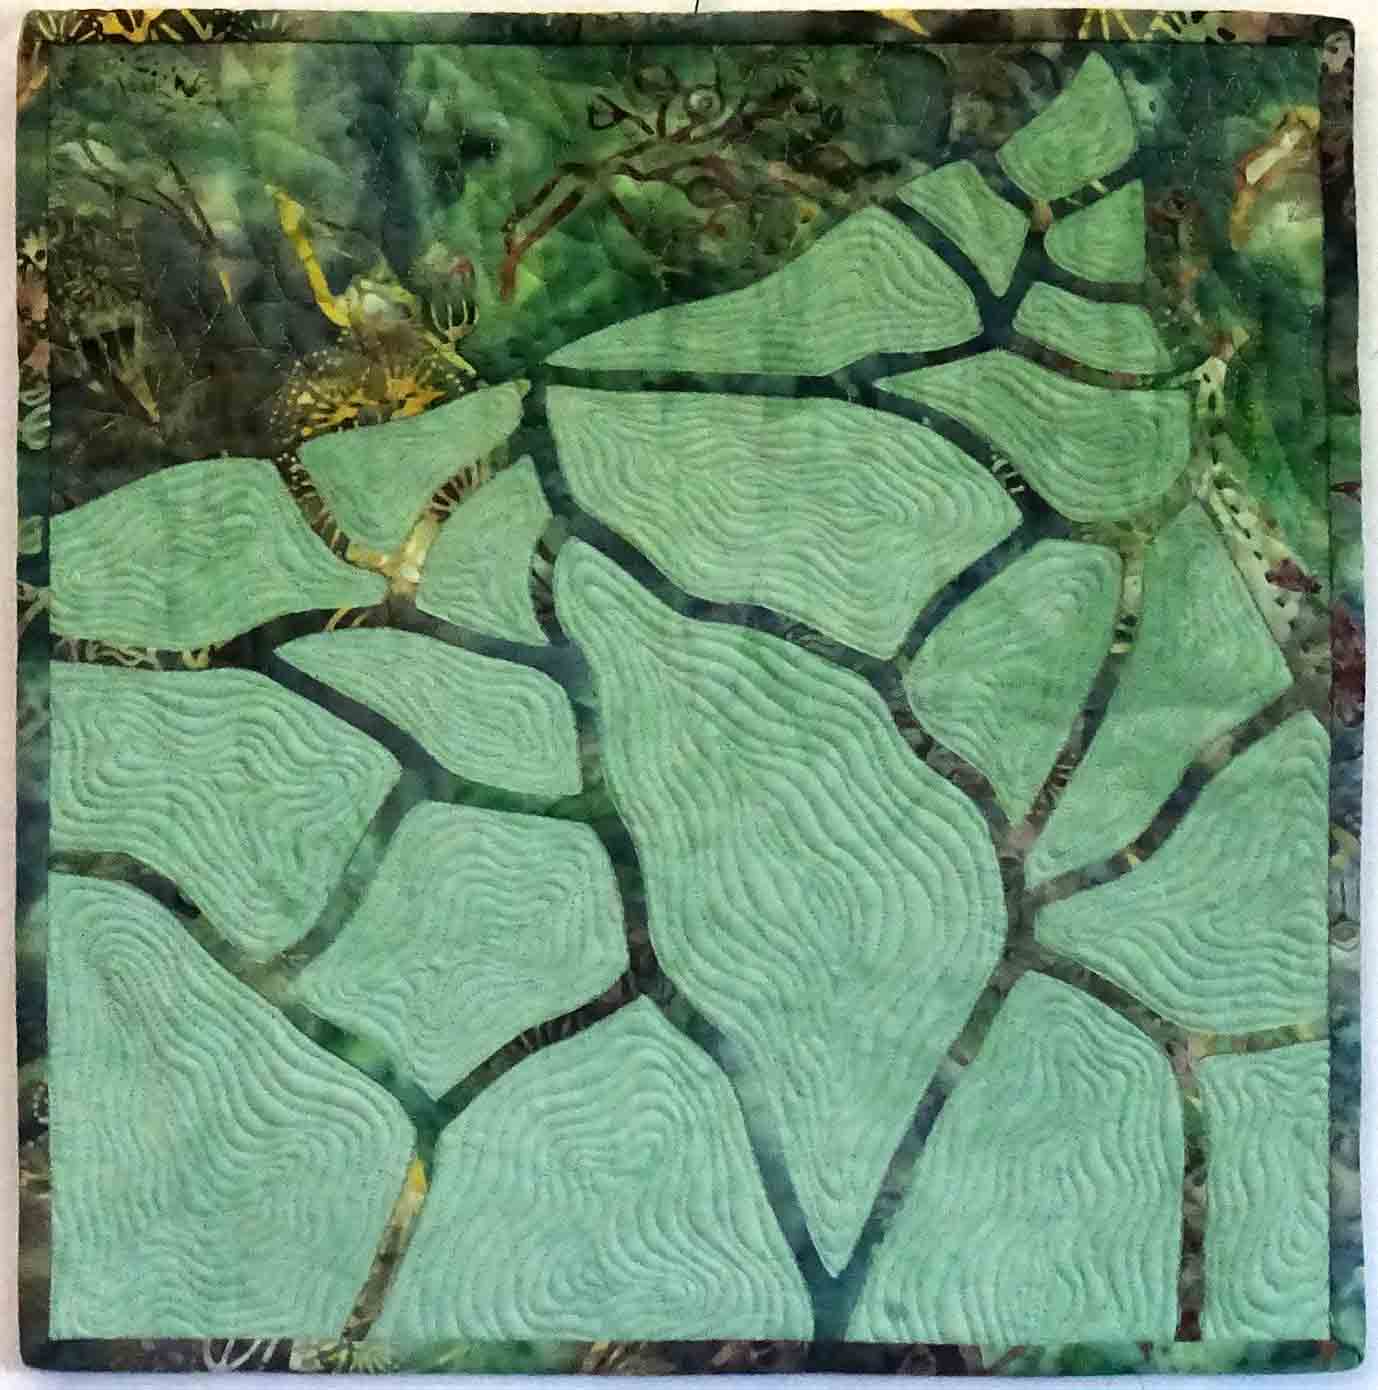
And now in a completely different style .... I've added another layer of dark tone to the drawing class challenge piece from last week.   I've used "shards" of dark turquoise silk and covered the piece with some wedding tule to keep it in place. 

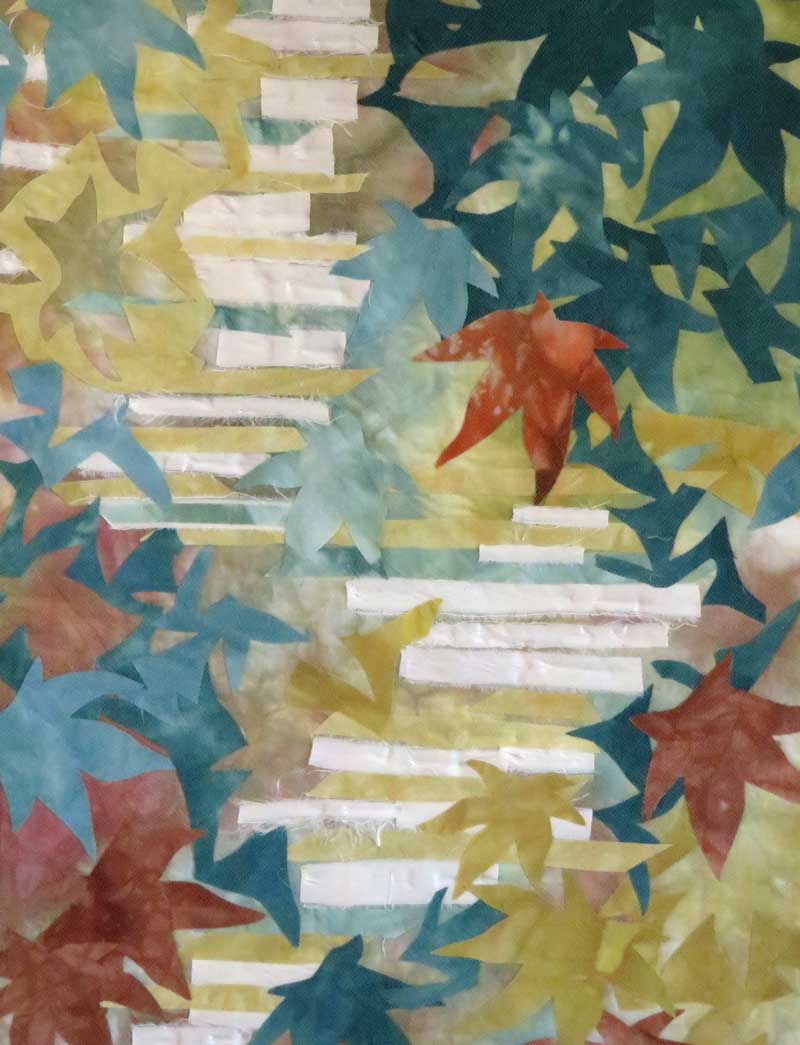
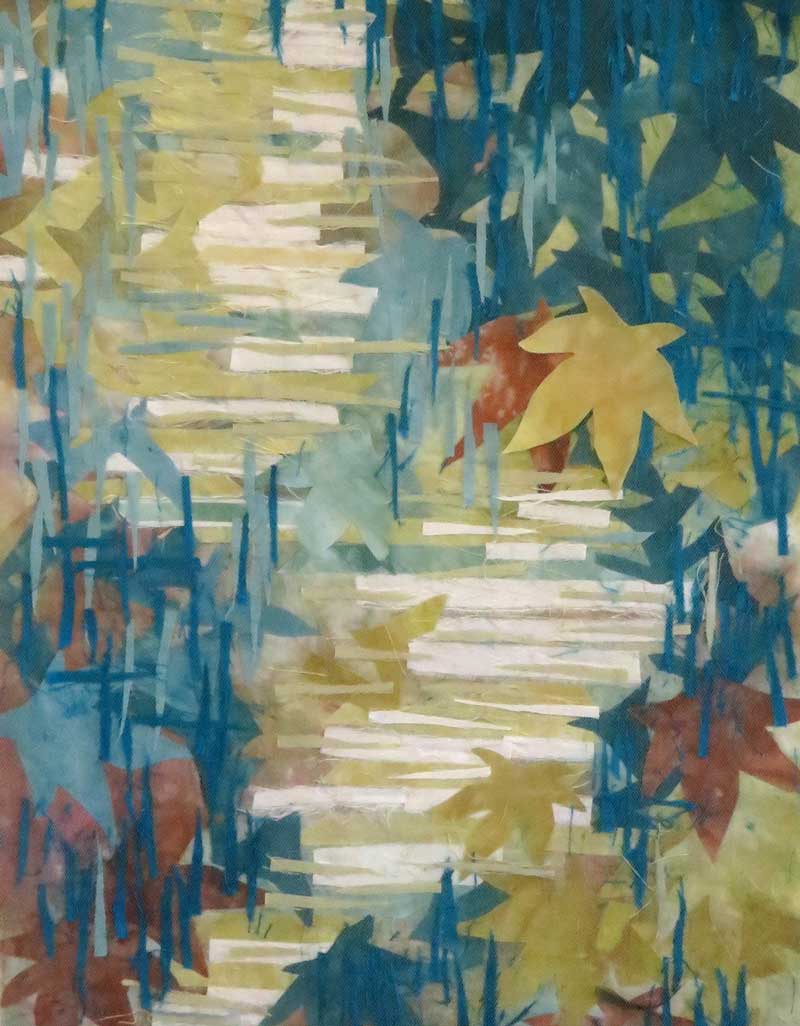
I'm still playing with it and there is still the stitching to be added .... what do you think.... an improvement????

Thanks for reading ......CC

Grevillea's in Review

My Grevillea Series has been rolling along for a while now and before I launch into Number 10, I thought it would be a good idea to review  progress.  Looking back and seeing the work all together is helpful with new directions and new ideas ... not to mention that it makes me get my photo files into order and update my art database!!

So here they are in sequence of construction .....

The first piece turned out to be a disaster from a technical point of view!  The issue related to layering fabric over the printed organza making for a very unstable piece when it came to the stitching!!!  However I like the color and design ideas and this piece remains on my design wall for inspiration.

After that experience,  I stuck to applique and reverse applique (with no fancy fabrics)  with a good result and second grevillea is part of the SAQA 2017 Trunk Show.  

In the Pink Grevillea piece I was determined to master the organza, because I really like the effect of printing on it,  and tried a variety of  flower shapes. This was a good learning experience but it lacks something from a design perspective!

In the middle row ...  the stylised fower design and development of the backgrounds by incorporating hand printed fabric has worked well and I am really pleased with these.  Peaches and Cream was part of an exhibition at Kangaroo Valley and now hangs in a new home!  

Recently I have been exploring a more abstracted flower design in the pink/purple pieces and have returned to the original idea of stitching the flower design ....... with much more success!

The final two pieces use the backgounds I made a couple of weeks ago,  now stitched and appliqued.  I think the blue/green/yellow piece is the most successful.

While I contemplate what next,  I would love to know which grevillea you like best??

Thanks for reading .....  CC

'Green' Collection ....

The 'Green'  Exhibition opened this week at Jing Jo Cafe in Kangaroo Valley and I was thrilled that a number of my pieces were included ......

Here is my 'Green' collection............

.... a set of 4 Stepping Stones pieces - 'Winding Way' , 'Peaches & Cream' - Grevillea 3 and 'Down by the Bay' - Mangroves 2.

 Even more exciting,  my grevillea piece was chosen as the image for the show ..... Thank you Belinda for all your hard work bring this exhibition together!

If you are in the vicinity of Kangaroo Valley I highly recommend the exhibition. ... there is an excellent variety of work on show .... and the coffee and food at Jing Jo's is excellent.  Here is the link to their site if you need their address and opening times ....  http://www.jingjo.com.au

If you visit,   I'd love to know what you think???  CC


Stitch First Applique Later!

With my new Grevillea piece I reversed my usual construction process by stitching the background before the applique!  Now this is not a new idea but one I've avoided because I like the flexibility that finalising the composition first allows.  Stitching first requires a bit of a leap of faith!  

Step one was stitching the background.  Doing the stitching first makes the process very easy, no shapes to navigate around so the stitching is very fluid and it's easy to achieve a good result.  It also helps to integrate any additions/variations in the background design.

With this piece I added the applique shapes in two steps.  Firstly the main structure of the flower and the leaves and secondly the overlapping flower shapes, stitching them down as I built up the design.

If you have followed previous posts you will know that I have had quite some issues with skipped stitches.  These skipped stitches occur because of movement in the layers as the needle  passes through multiple layers and are very frustrating!!!  By stitching the background first this issue is not longer of concern!!   So making this piece has been a much more enjoyable experience .......

                   'Peaches & Cream' - Grevillea 3   © Carolyn Collins 2017   16" x 16"  

                   'Peaches & Cream' - Grevillea 3   © Carolyn Collins 2017   16" x 16"  

Have you tried stitching first and what did you think about the process???

Thanks for dropping by .....  CC


New Work .... Mangroves

This week I've finished the quilting and facings for the Mangroves piece .......

Happy with the end result .... enjoyed the quilting .....

but can see refinements for the construction process ....  so on to the next mangroves piece!!  

Thanks for dropping by .....  CC

New Art in the Stepping Stones Series

This week I've been working on a new piece in the Stepping Stones Series ....  I love this series because it allows me to play with design and color combinations.

In the last piece I included a streak of contrasting blue ......

                 © Carolyn Collins 2016 " Written Road"   Hand dyed fabric  12" x 12"  

                 © Carolyn Collins 2016 " Written Road"   Hand dyed fabric  12" x 12"  

This time I've gone a bit further and used a contrasting fabric as the background for the reverse applique.....

               © Carolyn Collins 2016  " River or Road?"   Hand dyed fabric  12" x 12"

               © Carolyn Collins 2016  " River or Road?"   Hand dyed fabric  12" x 12"

The quilting is well underway .....  it looks so different in this photo of the work in the machine, an entirely different perspective!

                        © Carolyn Collins 2016  "River or Road Detail"  

                        © Carolyn Collins 2016  "River or Road Detail"  

I'm not sure whether this is a blue road or twin rivers??  I'll think about it while I get on with the quilting!  Thanks for stopping by ....  CC

A New Challenge!

Most of my art work to date has used hand dyed and painted/printed fabrics together with batik fabrics.  Recently I have been thinking that I would really like to make or create all the fabric I use in my work. This week my coach asked me what would it take?  The answer was simple ... just decide!    So I have.  There are a few pieces in the pipeline using batiks,  but from here on the challenge is to create all the fabrics I use.  

The most recent piece in the Stepping Stones series just happens meets the challenge .... the background in this piece is 'painted' ... I used painted fusible webbing to create the fabric ......

Stepping Stones # 10  Painted Road                         © CarolynCollins 2016

Stepping Stones # 10  Painted Road                         © CarolynCollins 2016

So the challenge is ahead!  I'll keep you posted.....

Latest Blue Trees Variation

A deadline is such a helpful thing .... I've been very focused this last week with a number of deadlines looming!!!

Finished the quilting on the latest piece in the Blue Trees Series ... its been sitting on the design wall for some time waiting for the last stitches!!! 

Blue Trees Variations # 5   © Carolyn Collins 2016   20" x 24"   Hand dyed fabric, batik

Blue Trees Variations # 5   © Carolyn Collins 2016   20" x 24"   Hand dyed fabric, batik

I am pleased with the way the quilting of the  top and bottom strips worked out.  I was just looking for texture and something that would not distract the eye.

This piece is a further evolution of the earlier representational landscapes of Blue Trees #1 and #2  and is a step larger in size.

Have yet to come up with a good name for it ..... any suggestions??

Finished ... really finished!


These last couple of weeks I've been coming to terms with what it means to finish a piece of work .... happy with the composition,  quilting done, facing/binding completed ... it's finished?  

Well no not  really!! (I admit to having a stack of pieces at this stage!)  .... but I still need to sign and label, sort out the hanging mechanism, photograph and record, and hang or store the piece.  What I've learned is that all these steps take time!!  and I need to factor that in to my process of making art! 

This piece is from my Stepping Stone series  and is called 'High Road'. You can see more of the series in the Gallery.   It is my donation to the SAQA Benefit Auction 2016  and is on its way to  the USA!  

Good feeling to be able to say it's finished ! 

Thanks for visiting   .....


Stepping Stones # 8  ' High Road'

Stepping Stones # 8  ' High Road'

Labelled and Hanging Sleeve added

Labelled and Hanging Sleeve added